

Posted by Christine Obbink-Huizer
Table of contents
In this blog we will focus on a problem that happens when working with input files. Not exclusively but it is often encountered when performing geostatic finite element analysis (FEA). Briefly, the problem is that the analysts work with finite element models where no geometry is available but only a mesh. Working without geometry brings an important limitation: re-meshing and therefore local refinement is not possible.
But Why Would We Need Re-meshing in the First Place?
Meshes next to a fault might be fine enough to capture the necessary detail. However, meshes away from the region of interest do not need to have the same level of refinement. If our domain extends through a couple of kilometres we would have extremely large meshes.
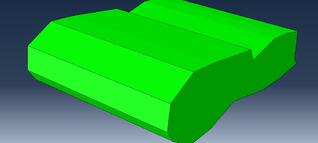
As it already comes meshed from the original software it could be coarse.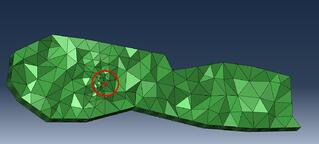
With just two elements to define the fault in length.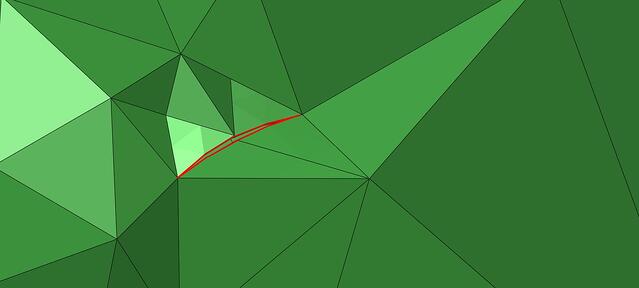
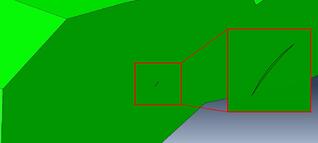
If we would have asked for a more refined mesh to have more elements defining the fault we would have ended with an unworkable mesh:
So, the best would be a trade-off between large elements away from the area of interest and a local refinement next to critical areas. But in order to do such we would need to have a geometry.
Lately, we have been in contact with at least two companies that use FEA to predict the behaviour of reservoirs and they both brought the same problem, “our software that is ok to predict reservoir behaviour does not allow us to have local refinements”. Thus, either we have the whole model extremely refined when it is unnecessary expensive or we have a coarse model that does not capture the necessary detail”. So, we discussed about the capabilities of Simulia Abaqus to aid in these kind of problems helping to generate a locally detailed mesh.
There were two main problems to solve: 1) in general generating geometry from a mesh but a sub problem was 2) to generate parts from a mesh.
How Can We Generate Geometry From a Mesh?
- It could be the case that you already have an input file, if that is the case you can import it as a model and the “orphan” mesh will be generated.
- In a more complex scenario the coordinates of the nodes can be read from the text document that contains the mesh i.e. “.vs”-file. In the latter case those coordinates would need to be used to generate a mesh in Abaqus. The workflow would be:
-
- generate a single -dummy- tetrahedral element in Abaqus (or triangular if it is in 2D)
- write an input file for that element and edit the input file
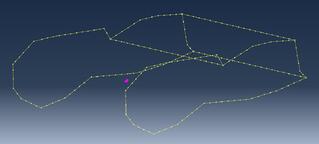
- from the original text file (i.e. .vs file) copy the coordinates of each node and the element connectivity, example below; if there are missing or extra commas additional editing will be necessary.
- Once those two tables are generated in the same format that it is generated for the single element generated in Abaqus (input file for the dummy element) you can replace the tables: the single element replaced by all these elements and nodes obtained from the .vs file. Then you save the input file and import it as a model with the extension .inp in Abaqus.
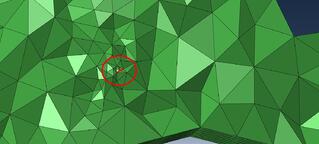
- We are one step ahead now, we already have the part as an orphan mesh in abaqus that e xplains the dark green color.
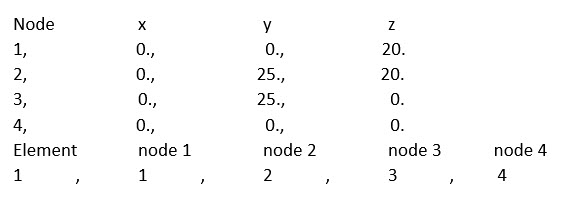
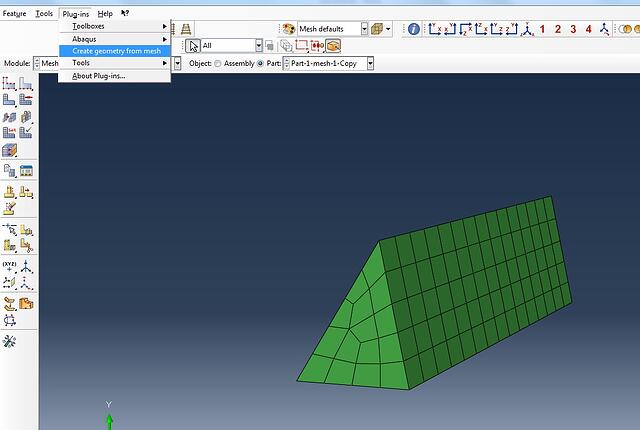
- The next step is to generate a geometry (main goal), because as it is now it cannot be re-meshed because, again, we do not have a geometry yet. The simplest option for generating a geometry from a mesh would be to use the free plug-in called 3D Mesh to Geometry Plugin
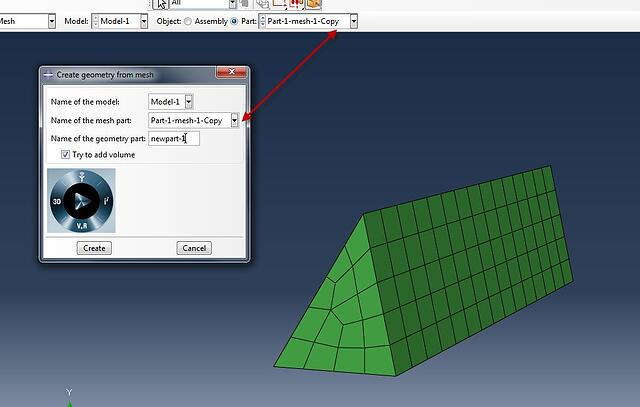
- By using this plug-in we can select the “part-mesh” obtained before and generate a new part that will contain geometry, do not forget to toggle on try to add volume, otherwise only the external faces will be generated.
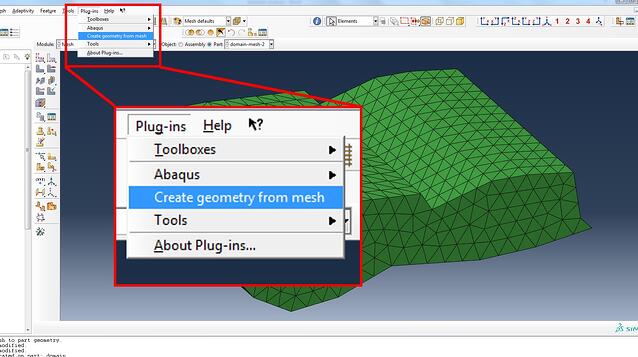
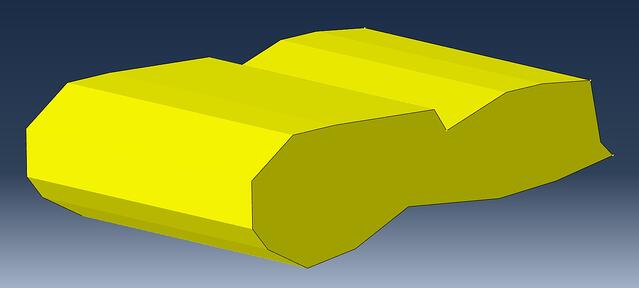
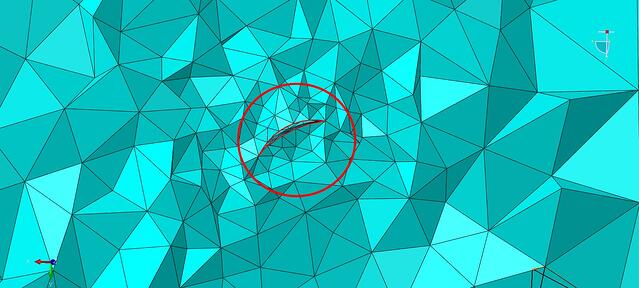
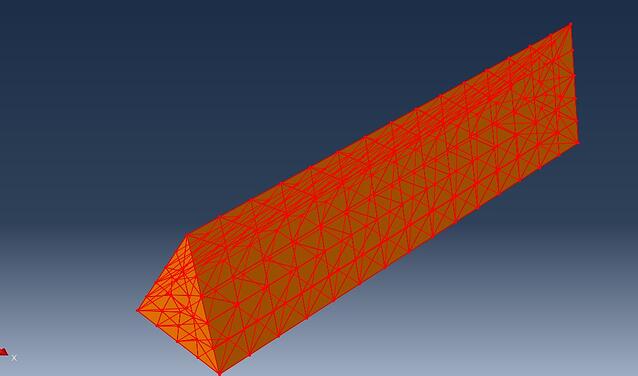
- Once the new part is generated you will see that it looks very much like the previous one, only coloured differently. However, now we do have a geometry and all the lines that we see that look like elements are just lines that have been carried from the original elements during the geometry generation procedure. The latter lines can be ignored in the mesh module by using the tool ignore entities.
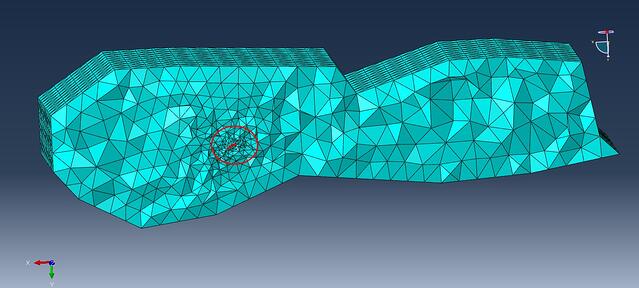
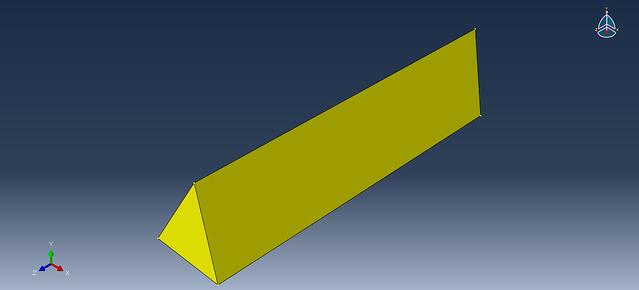
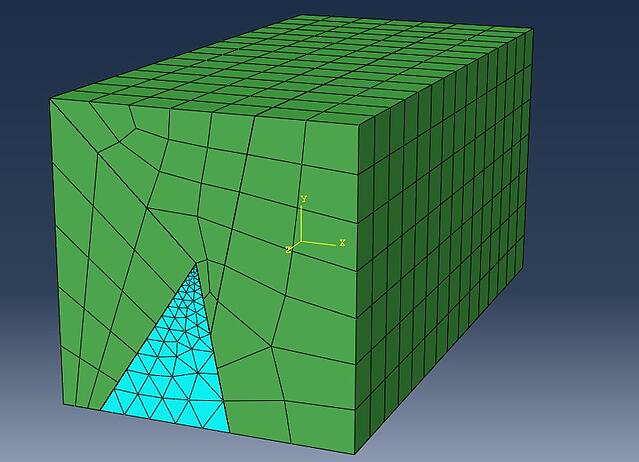
- Now we finally have a clean geometry that can be meshed with full control
- The domain is meshed coarse and the fault is meshed very fine

- The result is a fine mesh next to the faults that gradually transitions to a coarse mesh in the whole domain.
The other sub-problem that we mentioned before is to generate a part from an element set. The reason why we would need to do this is that in the initial geostatic software different areas can be generated as sets in order to define varying material properties (stone-ground-clay-etcetera). If we would like to assign the material properties again in Abaqus we will find that those areas cannot be distinguished. So we need to generate multiple parts for each set that can later on be individually chosen for material assignment..
How Can We Generate Part From a Mesh?
- Starting from an orphan mesh that already contains the element sets:
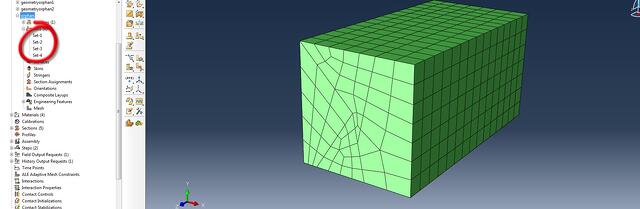
- Copy this part as many times as necessary separate parts need to be created:

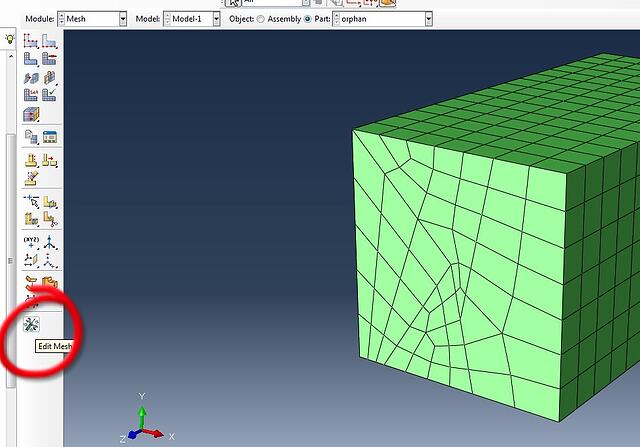
- Then in the mesh module Edit mesh:
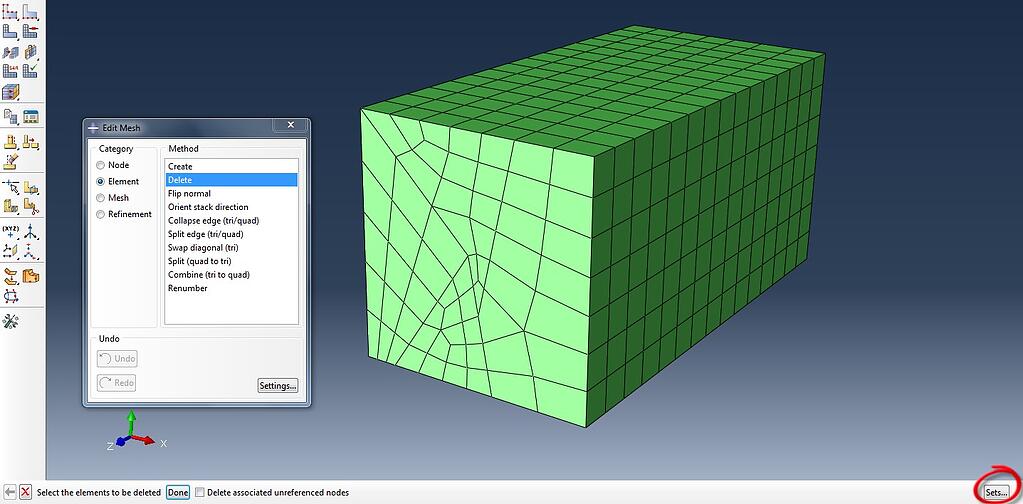
- Choose Element in the Category and Delete as the Method. From the bottom right click on Sets:
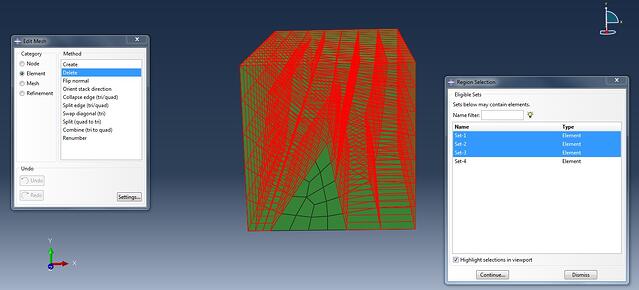
- Select all the sets but one to create a new part that will contain only those elements in the set that has not been deleted:
- Then in the current part only those element in the set that has not been selected will remain:

- By repeating this procedure with all the copy of the parts and removing selectively the necessary element sets you will generate all the individual parts representing each element set.
- Then the plug-in “Create geometry from mesh” can be used in each modified part:
In the new part created by using the plug-in go to the mesh module and use the option “Virtual Topology: ignore entities” and select the whole part. This operation will ignore all the lines and points that were previously the nodes and the element faces (now obsolete).
Accept the warning messages that are given and the new part (containing geometry) is ready to be meshed with full control:
Now the mesh can be easily refined locally:
Repeat the procedure to all the necessary elements set/new parts. The new parts can be included in a new/clean assembly and they will fit in the original position, so no need to re-position them.
Interested in Using Abaqus for Geostatic Analysis?


TECHNIA Simulation provides top tier FEA, Non-linear, and Advanced Simulation Software, Training, and Consultancy. Our dedicated team of more than 65 Simulation experts across 16 countries advise and support your innovation with a wealth of specialist knowledge and experience.
About TECHNIA- Related news and articles straight to your inbox
- Hints, tips & how-tos
- Thought leadership articles

Helping you find the information you’re looking for. Discover webinars, events, FAQ's, case studies and tutorials.
VIEW HUB