

Posted by Nikolaos Mavrodontis
Categories
submit monitor abaqus command windowTable of contents
This blog focuses on submitting an Abaqus job through the Command window and monitoring it without the Abaqus CAE interface.
Usually what most Abaqus users will do, in order to submit an analysis, is to create and submit the respectful job file when their preprocessing stage model is complete. This process is done in most cases through Abaqus CAE.
Subsequently the user will track the job monitor (accessible through the Job manager) in order to acquire valuable information regarding model related warnings and convergence performance of the solver.
However, there is quite often the need to submit a job file from the command window. The main reason behind this action, might as well be one of the following: ability to run several jobs simultaneously or sequentially, token re-allocation for extra CPUs in place of the CAE if the total number of tokens are limited, or if there are multiple Abaqus users occupying tokens etc.
The action of submitting a job through the CAE and the available options/outputs for monitoring the job’s progress through the Job monitor are features that can also be realized or accessed simply by the command window.
Setup Multiple Loadcases
For our example, we have setup a cantilever beam problem . One side of the beam is fully fixed and a pressure load is acting on the beam as shown in Picture 1. Three jobs will be set-up wherein the pressure load acting on the beam’s top surface will per analysis will be equal to 0.5, 1, 1.5 MPa respectively.
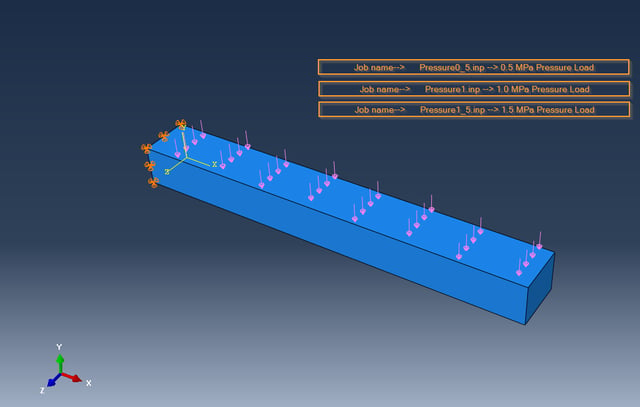
Picture 1: Setup Multiple Loadcases for cantilever beam.
Perform Datacheck
So let us assume that are model has been set-up correctly in the pre-processing stage. What is always good to do prior to submitting the analysis or in our case prior to writing the input file for submitting the analysis via the command window, is to perform a data check. With this action, Abaqus checks that the preprocessing part of our analysis is indeed well-posed. So let us assume that our first job is named “Pressure0_5” with a pressure load of 0.5 MPa acting on the beam’s top surface. The data check option is shown in Picture 2.
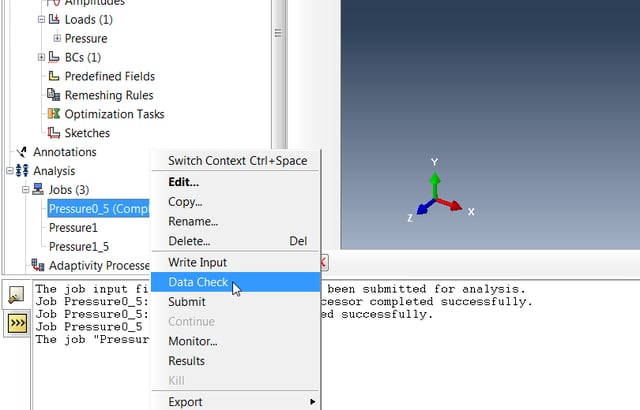
Picture 2: Datacheck for preprocessing.
Open Command Window Here
When the data check is complete, several files are created within our assigned Abaqus work directory. All relevant to our analysis files, are labelled as “Pressure0_5.”having different file endings. The content of those files will be explained in comparison with the job monitor. At this point, since there is an input file labelled “Pressure0_5.inp” located in the work directory, we are ready to submit our analysis directly from the command window. The action of writing the necessary analysis file (the .*inp file) from within the CAE, can be seen in Picture 2 (“Write Input”). This file will then be available in our work directory.
What we do next is open our work directory, hold on the “Shift” button on our keyboard and right-click our mouse and select the “Open Command Window here”option (Picture 3).
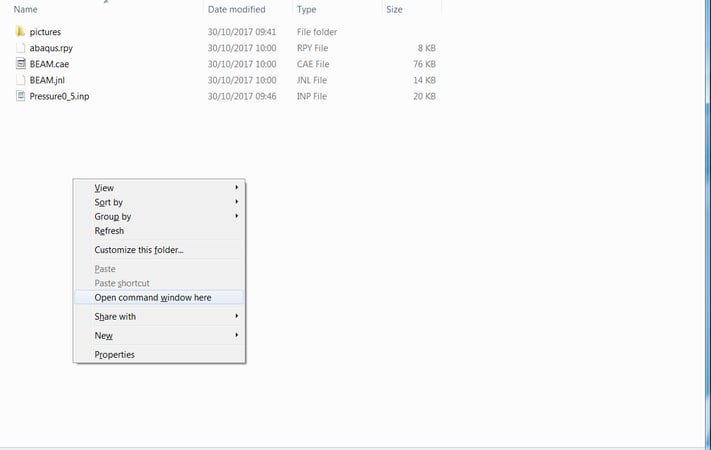
Picture 3: Open Comand Window here.
Submit Job Through Command Manager
Next we are ready to submit our job for analysis. This can be done by typing in the command "call abq2017 job=Pressure0_5 cpus=4" as shown in picture 4, and hitting “Enter” on the keyboard .
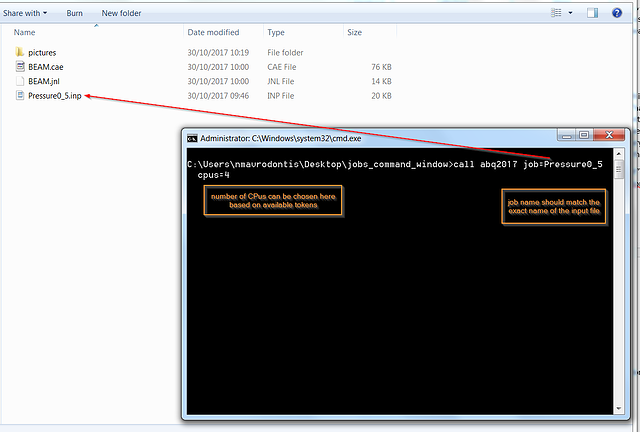
Picture 4: Submit job through command line.
Note: If you want to run double precision, in Picture 4, modify the job=Pressure0_5 to job=Pressure0_5 double.
After hitting “Enter” many files will start being produced in the work directory. These files are explained below in comparison with the available output from the Job monitor.
Abaqus Log File
The Abaqus log file provides basic information regarding analysis submission, completion time and type of solver used.
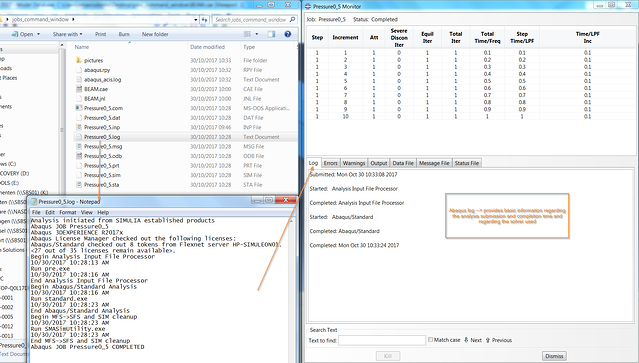
Picture 5: Abaqus Log file
Abaqus Data and msg Files
Abaqus data and message files contain useful preprocessing model information, as well as information regarding the tracking of the solver's convergence msg file.
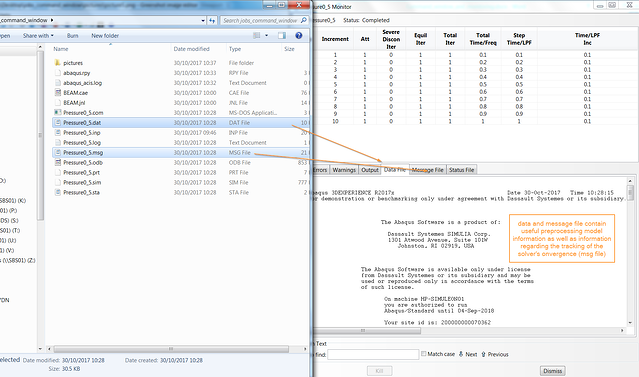
Picture 6: Abaqus data and message file
Abaqus Status File
The Abaqus Status file contains summary information regarding the increments, iterations and steps of the analysis.
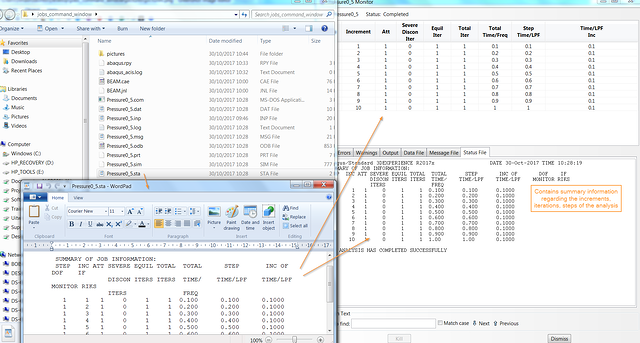
Picture 7: Abaqus status file.
This Abaqus status file (*.sta file) is usually the quickest way to monitor the job’s progress and potential convergence difficulties.
The *.odb file available in the work directory contains all the results visualization from our analysis. This is the main results file that Abaqus produces.
Running Multiple Jobs
For running multiple jobs either simultaneously or sequentially, Picture 8 describes the actions needed to do so. We need to create a .*txt file (here it is labelled “runme”) ,include certain keywords, and then save the *.txt file and change its ending to .*bat. Then all we need to do is double click on it. "Interactive" keyword makes sure the jobs are run sequentially. If you want to run jobs simulaneously, remove this keyword (you should have sufficient tokens to run multiple jobs simultaneously).
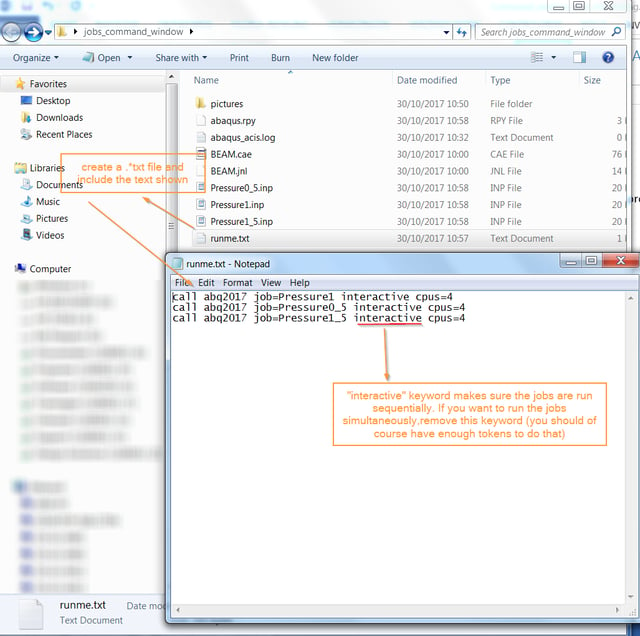
Picture 8: Create bat-file with multiple jobs.
If you want to read more on how to schedule a task to run multiple jobs in a certain directory, please read one of our previous blogs:


TECHNIA Simulation provides top tier FEA, Non-linear, and Advanced Simulation Software, Training, and Consultancy. Our dedicated team of more than 65 Simulation experts across 16 countries advise and support your innovation with a wealth of specialist knowledge and experience.
About TECHNIA- Related news and articles straight to your inbox
- Hints, tips & how-tos
- Thought leadership articles

Helping you find the information you’re looking for. Discover webinars, events, FAQ's, case studies and tutorials.
VIEW HUB